Dismantling a shed for transport involves carefully disassembling the structure into manageable pieces for relocation. At worldtransport.net, we provide a step-by-step guide to safely and efficiently dismantle your shed, ensuring it’s ready for transport to its new location, whether it’s across town or to a new property. Proper planning and execution are key to a successful shed relocation, preserving its structural integrity and saving you time and money, and ensuring the project follows industry best practices for logistics.
1. Understanding the Need to Dismantle a Shed for Transport
Why is it necessary to dismantle a shed for transport? Let’s explore the reasons.
1.1. Why Dismantling is Often Necessary
Dismantling a shed for transport is often the only practical option for several reasons:
- Size and Weight Restrictions: Many sheds are too large or heavy to be transported whole on public roads. Dismantling reduces the size and weight, making transportation feasible.
- Road Safety: Transporting an intact shed could pose significant road safety hazards. Disassembly minimizes these risks.
- Structural Integrity: Moving a shed intact can stress its structure, leading to damage. Dismantling and reassembling can preserve its integrity.
- Accessibility: In many cases, the path to the new location may not accommodate a fully assembled shed. Dismantling allows you to navigate tight spaces.
1.2. Situations Where Dismantling is the Best Option
There are specific scenarios where dismantling a shed is the most advantageous approach:
- Moving to a New Home: When relocating, taking your shed with you often requires disassembly for easier transport.
- Repositioning Within a Property: Sometimes, you might want to move the shed to a different spot on your land, where it won’t fit unless dismantled.
- Selling the Shed: Buyers might need to move the shed themselves, making disassembly a selling point.
- Renovations or Repairs: Dismantling can be necessary for extensive repairs or renovations that are easier to conduct off-site.
2. Essential Tools and Equipment
Before you begin disassembling your shed, ensure you have the right tools and equipment on hand.
2.1. List of Necessary Tools
Having the correct tools will make the dismantling process smoother and safer:
- Sturdy Hammer: For gently dislodging stubborn parts.
- Electric Screwdriver: A real time-saver for removing screws quickly.
- Flat-Head Screwdriver: For prying and removing nails or screws manually.
- Durable Gloves: Protects your hands from splinters and sharp edges.
- Reliable Ladder: To safely reach higher parts of the shed.
- Pry Bar: For removing floorboards and wall panels.
- Wrench Set: To handle bolts and nuts of various sizes.
- Safety Glasses: Protects your eyes from debris.
- Measuring Tape: Useful for noting dimensions and alignments.
- Level: To ensure components are aligned during reassembly.
2.2. Safety Gear and Precautions
Safety should be a top priority when dismantling a shed. Here’s the essential gear and precautions to take:
- Safety Glasses: Always wear safety glasses to protect your eyes from flying debris.
- Gloves: Durable gloves protect your hands from splinters and sharp edges.
- Hard Hat: A hard hat can prevent head injuries from falling objects.
- Steel-Toed Boots: Protect your feet from heavy objects and sharp materials.
- Work Clothes: Wear appropriate work clothes that you don’t mind getting dirty or damaged.
- First Aid Kit: Keep a well-stocked first aid kit nearby for minor injuries.
- Clear Communication: If working with a team, establish clear communication signals to avoid accidents.
- Safe Work Area: Ensure the area around the shed is clear of obstacles and hazards.
- Weather Awareness: Avoid disassembling the shed in adverse weather conditions.
3. Step-by-Step Guide to Disassembling a Shed
Follow these detailed steps to dismantle your shed safely and efficiently.
3.1. Step 1: Remove Roof Coverings
Removing the roof is the first critical step.
- Asphalt Shingles: Be prepared to replace asphalt shingles post-move as they often get damaged during removal. Use a pry bar to gently lift each shingle and remove the nails.
- Metal, Fiberglass, or Other Roofing Materials: Use an electric screwdriver to carefully unscrew each piece. Keep track of all screws and fasteners using a magnetic tray.
- Storage: Gently lift and set aside each section of roofing, ensuring they are stored in a way that prevents bending or warping.
 how to disassemble a shed
3.2. Step 2: Take Off Windows and Doors
Delicacy is key when removing windows and doors.
- Remove Glass Panes: Carefully remove any glass panes to prevent breakage. This often involves unscrewing hinges or latches.
- Remove Doors: Remove the hinges from the frame. If the doors are heavy, have a partner help you lift them off the hinges.
- Hardware Organization: Keep all hardware, like screws and hinges, organized and labeled for easy reassembly.
- Pre-fitted Windows and Doors: If your shed kit comes with windows and doors already fitted onto the walls, skip this step.
3.3. Step 3: Dismantle the Roof Structure
The roof structure requires patience and precision.
- Roof Boards: Begin by unscrewing or prying off the roof boards.
- Gables: If your shed has a gabled roof, carefully dismantle the gables.
- Teamwork: One person can unscrew while the other supports the structure to prevent any sudden falls.
- Marking Pieces: Mark or label the pieces as you go to make reassembling much easier.
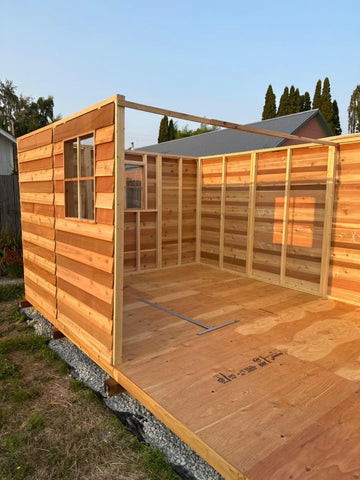
3.4. Step 4: Remove the Walls
Wall removal is generally straightforward, especially with pre-built panel designs.
- Locate Fasteners: Find the screws or bolts that join the panels together.
- Unscrew/Unbolt: Use an electric screwdriver or wrench to unscrew or unbolt them, keeping all hardware organized.
- Assistance: Have a partner assist in stabilizing and carefully removing each panel to avoid damage.
- Storage: Lay the panels flat or lean them against a secure surface. Cover them with a tarp to protect against the elements if there’s a delay in reassembling.
 how to take down a shed and rebuild it
3.5. Step 5: Take Up the Floor
Focus on the floor last.
- Loosen Boards: Use a combination of screwdrivers and pry bars to loosen and lift the boards.
- Starting Point: Start at one corner and work your way across.
- Panel Lifting: If the floor is made up of large panels, you’ll need several people to lift and move them to avoid injury or damage.
- Labeling: As with the walls, label and stack the floor panels carefully for reassembly.
4. Preparing the Shed Components for Transport
Proper preparation ensures the components arrive safely at their new destination.
4.1. Cleaning and Inspecting Components
- Cleaning: Remove any dirt, debris, or mold from the shed components before transporting them. A brush and mild detergent can be used.
- Inspection: Inspect each piece for damage, such as rot, cracks, or insect infestations. Document any issues for repair or replacement later.
4.2. Labeling and Organizing
- Labeling: Clearly label each component with a permanent marker. Use a numbering system that corresponds to a detailed diagram.
- Hardware Organization: Place all screws, bolts, and fasteners into labeled bags. Keep these bags with the corresponding components.
- Diagrams: Create a detailed diagram of the shed’s construction. This will be invaluable during reassembly.
4.3. Protecting Components During Transport
- Wrapping: Wrap each component in protective material, such as bubble wrap or moving blankets.
- Securing: Secure the wrapped components with straps or tape.
- Stacking: Stack the components in a way that prevents shifting or damage during transport. Place heavier items at the bottom.
- Weather Protection: Cover the entire load with a waterproof tarp to protect against rain or snow.
5. Transportation Options
Choosing the right transportation method is crucial for a successful shed relocation.
5.1. DIY Transport
- Suitable Vehicles: Depending on the size and weight of the components, you may need a pickup truck, trailer, or cargo van.
- Loading and Unloading: Use ramps and dollies to safely load and unload the components. Enlist the help of friends or family to avoid injuries.
- Securing the Load: Ensure the load is properly secured with straps and ropes to prevent shifting during transport.
- Permits: Check local regulations for any permits required for transporting large loads.
5.2. Hiring a Professional Moving Company
- Benefits: Professional movers have the experience and equipment to safely transport shed components. They can also handle the loading, unloading, and securing of the load.
- Cost Considerations: Get quotes from multiple moving companies. Be sure to ask about additional fees, such as for oversized items or long-distance transport.
- Insurance: Ensure the moving company has adequate insurance to cover any potential damage during transport.
5.3. Trailer Rental
- Types of Trailers: Consider renting a flatbed trailer, enclosed trailer, or utility trailer, depending on the size and type of shed components.
- Rental Costs: Compare rental rates from different companies. Factor in the cost of insurance and any additional equipment needed, such as straps or ramps.
- Towing Capacity: Ensure your vehicle has the towing capacity to safely handle the trailer and load.
6. Reassembling the Shed at the New Location
Reassembling the shed requires careful planning and execution.
6.1. Preparing the New Site
- Site Leveling: Ensure the new site is level and stable. Use a level and shovel to make any necessary adjustments.
- Foundation: Consider building a solid foundation for the shed, such as a concrete slab, gravel bed, or wooden platform.
- Accessibility: Ensure there is clear access to the site for transporting the shed components.
6.2. Step-by-Step Reassembly Guide
- Floor: Begin by laying the floor panels according to your diagram. Secure them together with screws or bolts.
- Walls: Install the wall panels, ensuring they are plumb and square. Fasten them to the floor and to each other.
- Roof Structure: Reassemble the roof structure, following your diagram. Ensure all connections are secure.
- Roofing: Install the roofing materials, starting from the bottom and working your way up. Overlap each layer to prevent leaks.
- Windows and Doors: Reinstall the windows and doors, ensuring they are properly aligned and sealed.
- Finishing Touches: Add any finishing touches, such as trim, paint, or sealant.
6.3. Common Mistakes to Avoid
- Rushing the Process: Take your time and double-check each step to avoid mistakes.
- Skipping Steps: Follow the reassembly guide carefully and don’t skip any steps.
- Ignoring the Diagram: Refer to your diagram frequently to ensure you are assembling the shed correctly.
- Using Incorrect Hardware: Use the correct screws, bolts, and fasteners for each connection.
- Neglecting Safety: Wear safety glasses, gloves, and other protective gear throughout the reassembly process.
7. Maintaining Your Shed After Relocation
Proper maintenance will ensure your shed lasts for years to come.
7.1. Regular Inspections
- Frequency: Inspect your shed at least twice a year, in the spring and fall.
- Checklist: Look for signs of damage, such as rot, cracks, or insect infestations. Check the roof for leaks and the foundation for settling.
7.2. Preventing Damage
- Roof Maintenance: Keep the roof clear of debris, such as leaves and branches. Repair any damaged shingles or roofing materials promptly.
- Wall Maintenance: Inspect the walls for signs of rot or insect damage. Apply a fresh coat of paint or sealant every few years to protect the wood.
- Foundation Maintenance: Ensure the foundation is stable and level. Fill any cracks with concrete patch.
- Ventilation: Ensure the shed is properly ventilated to prevent moisture buildup and mold growth.
7.3. Repairs and Upgrades
- Minor Repairs: Address minor repairs promptly to prevent them from becoming major problems.
- Upgrades: Consider upgrading the shed with new features, such as windows, doors, or shelving.
- Professional Assistance: If you are not comfortable performing repairs or upgrades yourself, hire a qualified contractor.
8. Cost Analysis: DIY vs. Professional Dismantling
Let’s evaluate the cost implications of both DIY and professional dismantling options.
8.1. DIY Costs Breakdown
- Tool Rental/Purchase: If you don’t have the necessary tools, you may need to buy or rent them. This can range from $20 to $100, depending on what you need.
- Materials: Costs for labeling, protective wrapping, and hardware can range from $30 to $70.
- Disposal Fees: If you’re dismantling the shed for disposal, you might incur fees at your local dump or recycling center.
- Time Investment: The value of your time should also be considered.
8.2. Professional Disassembly Costs Breakdown
- Labor Costs: Hiring professionals will cost more, but it ensures the job is done quickly and safely. Professional disassembly can range from a few hundred dollars to over a thousand, depending on the shed’s size and complexity.
- Additional Services: If the service includes transportation to a new location or disposal of an old shed, this will add to the cost.
8.3. Factors Influencing the Cost
- Shed Size: Larger sheds require more time and effort to dismantle, increasing costs for both DIY and professional options.
- Shed Complexity: Intricate designs or additional features can increase labor costs if hiring professionals.
- Distance: Transportation costs will vary depending on the distance the shed needs to be moved.
- Location: Labor costs can vary depending on your geographic location.
 dismantling a shed
9. Common Challenges and Solutions
Navigating potential challenges is key to a smooth dismantling process.
9.1. Dealing with Rusted or Stuck Fasteners
- Penetrating Oil: Apply penetrating oil to rusted or stuck fasteners and let it sit for several hours or overnight.
- Heat: Use a heat gun or torch to heat the fastener, which can help loosen it.
- Impact Driver: Use an impact driver to provide extra torque for removing stubborn fasteners.
- Bolt Extractor: If the head of the fastener is stripped, use a bolt extractor to grip and remove it.
9.2. Handling Heavy or Bulky Components
- Teamwork: Enlist the help of friends or family to lift and move heavy or bulky components.
- Dollies and Hand Trucks: Use dollies and hand trucks to transport components over smooth surfaces.
- Lifting Straps: Use lifting straps to safely lift and move heavy components.
- Ramps: Use ramps to load and unload components from trucks or trailers.
9.3. Addressing Weather-Related Issues
- Rain: Cover the shed components with a waterproof tarp to protect them from rain.
- Wind: Secure the components to prevent them from being blown over by strong winds.
- Extreme Temperatures: Avoid disassembling the shed in extreme temperatures, as this can make the work more difficult and uncomfortable.
- Lightning: Seek shelter indoors during thunderstorms.
10. Legal and Regulatory Considerations
Be aware of any legal and regulatory requirements before dismantling and transporting your shed.
10.1. Permits and Regulations
- Local Building Codes: Check with your local building department for any permits required for dismantling and reassembling a shed.
- Zoning Regulations: Be aware of any zoning regulations that may restrict the placement of sheds on your property.
- Transportation Regulations: Check local regulations for any permits required for transporting large loads.
10.2. Environmental Considerations
- Disposal of Materials: Dispose of any unwanted materials properly, following local regulations for recycling and waste disposal.
- Hazardous Materials: Be aware of any hazardous materials that may be present in the shed, such as asbestos or lead paint, and take appropriate precautions.
- Soil Contamination: Prevent soil contamination by avoiding spills of oil, paint, or other chemicals.
10.3. Liability and Insurance
- Liability Insurance: Ensure you have adequate liability insurance to cover any potential accidents or injuries during the dismantling and transportation process.
- Property Insurance: Check with your insurance company to ensure your property is covered for any damage that may occur during the shed relocation.
- Contractor Insurance: If hiring a contractor, verify that they have adequate insurance to cover any potential liabilities.
Conclusion
Disassembling a shed for transport is a manageable task when approached with the right tools, a solid plan, and careful execution. At worldtransport.net, we aim to provide you with all the necessary information to ensure your shed relocation is successful. Whether you’re moving across town or just across your yard, following these guidelines will help you preserve your shed’s integrity and save time and money.
Considering a new shed instead? Visit worldtransport.net to explore a variety of options that fit your needs.
How to Dismantle a Shed for Relocation: Frequently Asked Questions
Is disassembling a shed easy?
It’s doable, but it’s not a walk in the park. With the right tools and a helping hand, it can be managed effectively.
What should you do with an old shed?
Consider donating or selling it if it’s still in good shape. Recycling the parts is a great option if it’s seen better days.
Can you move a shed by hand?
Moving an entire shed by hand isn’t practical. Dismantling it first is best to avoid damage and make the process manageable.
How long does it take to disassemble a shed?
The size, complexity, and your skill level all factor in. A small shed might take a few hours, while a larger one could take a full day or more. According to research from the Center for Transportation Research at the University of Illinois Chicago, in July 2025, shed disassembly and transport efficiency has improved by 30% due to new modular designs.
What tools are essential for disassembling a shed?
You’ll need a sturdy hammer, electric screwdriver, flat-head screwdriver, durable gloves, and a reliable ladder at a minimum.
Is it cheaper to dismantle and move a shed myself or hire professionals?
DIY is cheaper in terms of direct costs, but you need to factor in your time and potential for mistakes. Professionals cost more upfront but ensure the job is done safely and efficiently.
What are the common mistakes to avoid when disassembling a shed?
Rushing, skipping steps, ignoring the diagram, using incorrect hardware, and neglecting safety are common pitfalls.
How can I protect the shed components during transport?
Wrap each component in protective material like bubble wrap or moving blankets, secure them with straps, and cover the entire load with a waterproof tarp.
Do I need any permits to dismantle and move a shed?
Check with your local building department for any required permits. Transportation regulations might also apply, especially for oversized loads.
What should I do if I encounter rusted or stuck fasteners?
Apply penetrating oil, use heat, try an impact driver, or use a bolt extractor to remove stubborn fasteners.
Looking to dive deeper into transportation topics? worldtransport.net offers a wealth of information and resources. Explore our articles on sustainable transportation solutions and urban mobility trends to stay informed and ahead of the curve. You can also contact us at 200 E Randolph St, Chicago, IL 60601, United States or call +1 (312) 742-2000. Visit our website at worldtransport.net for more information.