
Traveling with your sewing machine might seem daunting, but it is manageable with proper preparation. At worldtransport.net, we provide expert guidance on ensuring your sewing machine arrives safely at your destination, offering peace of mind whether you’re moving, attending a quilting retreat, or simply sewing on the go. Discover how to navigate airline regulations and protect your equipment for a smooth journey with these logistical solutions, safe transport tips, and reliable airline information.
1. Can You Take A Sewing Machine On A Plane?
Yes, you can take a sewing machine on a plane, but it’s essential to understand the regulations and best practices for doing so. Sewing machines are generally allowed as both carry-on and checked baggage, but there are specific guidelines to follow to ensure safe transport and avoid any issues with airline security.
- Carry-on: Many travelers prefer to carry their sewing machines on board to keep them safe and prevent damage. In this case, you need to adhere to the airline’s size and weight restrictions for carry-on luggage.
- Checked Baggage: If you opt to check your sewing machine, proper packing and protection are crucial to prevent damage during transit.
When deciding whether to carry on or check your sewing machine, consider the following factors:
- Size and Weight Limits: Check the specific size and weight restrictions of the airline you are flying with.
- Value of the Machine: High-value or delicate machines are often better suited for carry-on to minimize the risk of damage.
- Personal Preference: Some travelers simply prefer the peace of mind of keeping their sewing machine with them.
Understanding these factors will help you make the best decision for transporting your sewing machine safely and efficiently.
2. What Are The Airline Regulations For Sewing Machines?
Navigating airline regulations for transporting a sewing machine requires careful attention to detail. Each airline has its own specific rules regarding size, weight, and packaging, which can significantly impact how you prepare your machine for travel. To ensure a hassle-free experience, it is crucial to check with your airline well in advance of your travel date.
Here’s a detailed breakdown of key considerations and how to address them:
2.1 Weight And Size Restrictions
Most airlines have strict weight and size limitations for both carry-on and checked baggage. For carry-on, the weight limit typically ranges from 7 to 10 kilograms (15 to 22 pounds), while size restrictions usually hover around 55 x 35 x 25 centimeters (22 x 14 x 10 inches). Checked baggage can often weigh up to 23 kilograms (50 pounds) for standard economy fares, with size limits varying.
- Carry-on: Ensure your sewing machine, along with its case, meets the specified weight and size requirements. Overweight or oversized items may need to be checked, incurring additional fees.
- Checked Baggage: If checking your machine, stay within the weight and size limits to avoid extra charges. Consider the overall dimensions of your luggage to accommodate the sewing machine securely.
2.2 Carry-On Vs. Checked Baggage Policies
The decision to carry on or check your sewing machine depends on several factors, including the machine’s value, size, and the airline’s specific policies. Carrying it on allows you to keep a close eye on your equipment, reducing the risk of damage or loss. However, checked baggage might be more practical for larger, heavier machines.
- Carry-on: Ideal for smaller, lightweight machines that fit within carry-on dimensions. Be prepared to remove the machine from its case for inspection at security checkpoints.
- Checked Baggage: Suitable for larger machines, provided they are adequately protected. Use a hard case and plenty of padding to safeguard against rough handling.
2.3 Security Screening Procedures
Security personnel will need to inspect your sewing machine, whether you carry it on or check it. Understanding the screening process can help expedite your passage through security.
- Carry-on: Be ready to remove the sewing machine from its case and place it in a separate bin for X-ray screening. Inform the security officer about the machine to avoid any misunderstandings.
- Checked Baggage: Security may inspect checked luggage, so ensure your machine is easily accessible. Including a note explaining what the item is can also help streamline the process.
2.4 Airline-Specific Rules
Different airlines have varying policies regarding the transport of sewing machines. It’s crucial to consult the specific guidelines of the airline you’re flying with to avoid any surprises at the airport.
- Research: Visit the airline’s website or contact their customer service to inquire about specific rules for sewing machines.
- Documentation: Print out the relevant policies and keep them with you during travel in case you need to reference them.
Adhering to these airline regulations will help ensure your sewing machine travels safely and without complications. By taking the time to understand and comply with these guidelines, you can focus on enjoying your trip and your sewing projects.
3. How To Pack A Sewing Machine For Air Travel?
Packing your sewing machine properly is paramount to ensuring it arrives safely at your destination. The right packing materials and techniques can protect your machine from damage caused by turbulence, rough handling, and other hazards of air travel.
3.1 Choosing The Right Case
Selecting the appropriate case is the first and most crucial step in packing your sewing machine. There are several options available, each offering different levels of protection:
- Hard Cases: These provide the most robust protection and are ideal for checked baggage. Look for cases with custom foam inserts to hold your machine snugly and prevent movement.
- Soft Cases: These are lighter and more suitable for carry-on. Choose a padded case with sturdy handles and reinforced seams.
- Original Packaging: If you still have the original box and packaging materials, these can offer excellent protection, especially for delicate machines.
Consider the following factors when choosing a case:
- Durability: The case should be able to withstand the rigors of travel.
- Padding: Adequate padding is essential to absorb shocks and vibrations.
- Size and Weight: Ensure the case meets airline restrictions for carry-on or checked baggage.
3.2 Essential Packing Materials
In addition to a suitable case, you’ll need several packing materials to provide extra protection for your sewing machine:
- Bubble Wrap: Use bubble wrap to cushion the machine and fill any empty spaces in the case.
- Packing Peanuts: These lightweight fillers are great for preventing movement inside the case.
- Foam Inserts: Custom foam inserts can be cut to fit your machine perfectly, providing maximum protection.
- Packing Tape: Use strong packing tape to secure the case and prevent it from opening during transit.
- Fragile Stickers: Clearly label the case as fragile to alert baggage handlers to handle it with care.
3.3 Step-By-Step Packing Guide
Follow these steps to pack your sewing machine securely for air travel:
- Prepare the Machine: Remove all detachable parts, such as the needle, presser foot, and bobbin. Store these in a separate, padded container.
- Wrap the Machine: Wrap the sewing machine in several layers of bubble wrap, paying particular attention to delicate areas like the knobs and dials.
- Place in the Case: Carefully place the wrapped machine into the case. Ensure it fits snugly and doesn’t move around.
- Fill Empty Spaces: Use packing peanuts, foam inserts, or additional bubble wrap to fill any empty spaces in the case. This will prevent the machine from shifting during transit.
- Secure the Case: Close the case securely and use packing tape to reinforce the seams and closures.
- Label as Fragile: Affix fragile stickers to all sides of the case to alert baggage handlers to handle it with care.
3.4 Additional Tips For Secure Packing
- Take Photos: Before sealing the case, take photos of the packed machine. This can be useful for insurance purposes if any damage occurs.
- Insurance: Consider purchasing travel insurance that covers damage to your sewing machine during transit.
- Inventory List: Create an inventory list of all items packed in the case. This can help you verify that everything is accounted for upon arrival.
By following these packing guidelines, you can significantly reduce the risk of damage to your sewing machine during air travel. Proper preparation and the right materials are key to ensuring your machine arrives in perfect condition, ready for your next sewing project.
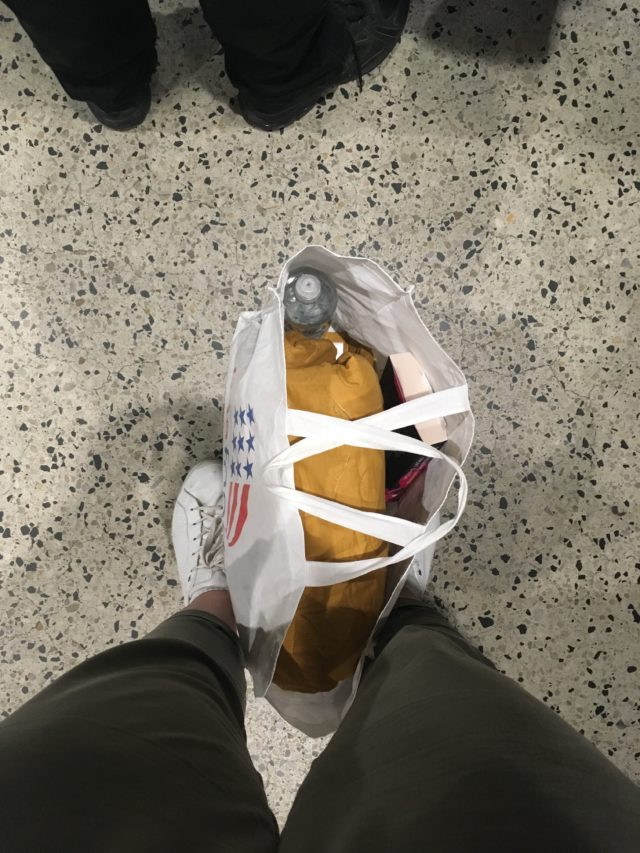 Flying with a sewing machine
4. How To Protect Your Sewing Machine From Damage?
Protecting your sewing machine from damage during air travel involves more than just packing it securely. It requires understanding the potential risks and taking proactive steps to mitigate them.
4.1 Understanding Potential Risks
Air travel can be hard on luggage, and sewing machines are particularly vulnerable to damage due to their delicate components. Here are some common risks to be aware of:
- Rough Handling: Baggage handlers may not always handle luggage with care, leading to impacts and shocks.
- Turbulence: In-flight turbulence can cause luggage to shift and move around in the cargo hold.
- Temperature and Humidity: Extreme temperatures and humidity can damage sensitive electronic components and cause corrosion.
- Compression: Luggage stacked on top of your sewing machine can exert pressure and cause damage.
4.2 Securing Removable Parts
One of the best ways to protect your sewing machine is to remove and secure any detachable parts. This prevents them from breaking off during transit and potentially damaging the machine.
- Needle: Remove the needle and store it in a protective case to prevent injury and damage.
- Presser Foot: Detach the presser foot and store it in a separate compartment or padded bag.
- Bobbin: Remove the bobbin and store it in a bobbin case to prevent tangling and damage.
- Power Cord and Pedal: Disconnect the power cord and pedal and store them in a separate bag or compartment.
4.3 Padding And Cushioning Techniques
Proper padding and cushioning are essential to absorb shocks and vibrations during transit. Use these techniques to protect your sewing machine:
- Bubble Wrap: Wrap the entire machine in several layers of bubble wrap, paying particular attention to delicate areas.
- Foam Inserts: Use custom foam inserts to create a snug fit inside the case and prevent movement.
- Packing Peanuts: Fill any empty spaces in the case with packing peanuts to prevent the machine from shifting.
- Soft Cloths: Use soft cloths or towels to provide additional cushioning and protect the machine from scratches.
4.4 Reinforcing The Case
Reinforcing the case can provide extra protection against impacts and compression. Use these techniques to strengthen the case:
- Packing Tape: Use strong packing tape to reinforce the seams and closures of the case.
- Strapping: Use luggage straps to secure the case and prevent it from opening during transit.
- Corner Protectors: Attach corner protectors to the case to prevent damage to vulnerable areas.
4.5 Temperature And Humidity Control
Extreme temperatures and humidity can damage your sewing machine. Take these steps to protect it from the elements:
- Desiccant Packs: Place desiccant packs inside the case to absorb moisture and prevent corrosion.
- Insulated Case: Use an insulated case to protect the machine from extreme temperatures.
- Avoid Direct Sunlight: Store the packed machine in a cool, dry place away from direct sunlight.
By understanding the potential risks and taking these protective measures, you can significantly reduce the likelihood of damage to your sewing machine during air travel. Proper preparation and attention to detail are key to ensuring your machine arrives in perfect condition, ready for your next sewing adventure.
5. What To Do At Airport Security With A Sewing Machine?
Navigating airport security with a sewing machine requires preparation and patience. Knowing what to expect and how to handle the screening process can make your experience smoother and less stressful.
5.1 Notifying TSA Agents
Upon arriving at the security checkpoint, it’s wise to inform the Transportation Security Administration (TSA) agents that you are traveling with a sewing machine. This heads off any confusion and shows that you’re being proactive.
- Verbal Notification: As you approach the security line, politely inform a TSA agent that you have a sewing machine in your carry-on.
- Honesty: Be straightforward about the contents of your bag. Transparency can prevent delays and misunderstandings.
5.2 Removing The Sewing Machine For Inspection
Be prepared to remove the sewing machine from its case for inspection. This is standard procedure, and the TSA agents will need to examine the machine to ensure it meets security requirements.
- Easy Access: Pack your sewing machine so that it’s easily accessible. This will expedite the process and show the agents that you are organized.
- Gentle Handling: Carefully remove the sewing machine from its case and place it in a bin for X-ray screening. Handle the machine gently to avoid any damage.
5.3 Understanding X-Ray Screening
The sewing machine will need to go through the X-ray machine for screening. This allows the TSA agents to get a clear view of the machine’s components without physically disassembling it.
- Cooperation: Follow the TSA agent’s instructions and cooperate fully with the screening process.
- Patience: Be patient and allow the agents to do their job thoroughly. Security checks are in place to ensure the safety of all passengers.
5.4 Addressing Potential Concerns
TSA agents may have questions or concerns about certain aspects of the sewing machine. Be ready to address these concerns calmly and provide any necessary information.
- Needles and Sharp Objects: If you have needles or other sharp objects in your sewing kit, make sure they are properly stored and declared.
- Explanation: Explain the purpose of the sewing machine and its components. Most TSA agents are familiar with sewing machines and will appreciate your honesty and cooperation.
5.5 Repacking The Sewing Machine
After the inspection, you’ll need to repack the sewing machine securely. Take your time and ensure that everything is properly placed to prevent damage during transit.
- Careful Placement: Carefully place the sewing machine back into its case, making sure it fits snugly and doesn’t move around.
- Secure Closure: Close the case securely and double-check that all closures are fastened.
5.6 Additional Tips For A Smooth Experience
- Arrive Early: Give yourself plenty of time to go through security. This will reduce stress and allow you to handle any unexpected delays.
- Stay Calm: Remain calm and courteous throughout the screening process. A positive attitude can go a long way in ensuring a smooth experience.
- Check TSA Guidelines: Familiarize yourself with the TSA’s guidelines for traveling with sewing machines and other potentially problematic items.
By following these guidelines, you can navigate airport security with your sewing machine confidently and efficiently. Proper preparation and a cooperative attitude are key to ensuring a hassle-free experience.
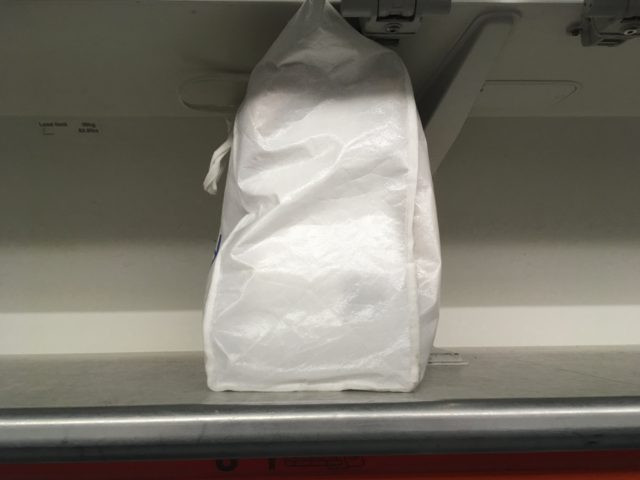 Flying with a sewing machine carry on
6. What Are The Best Sewing Machine Cases For Air Travel?
Choosing the right sewing machine case is essential for protecting your valuable equipment during air travel. The best cases offer a combination of durability, padding, and convenience, ensuring that your machine arrives safely at your destination.
6.1 Hard Cases
Hard cases are the most protective option for air travel. They are typically made from rigid materials like plastic or aluminum and offer excellent impact resistance.
- Pros:
- Superior protection against impacts and compression.
- Durable and long-lasting.
- Ideal for checked baggage.
- Cons:
- Heavier and bulkier than soft cases.
- Can be more expensive.
Example: A popular choice is the Reliable Sew Steady Rolling Sewing Machine Case. It features a hard exterior, custom foam inserts, and a telescoping handle for easy transport.
6.2 Soft Cases
Soft cases are lighter and more flexible than hard cases, making them a good option for carry-on luggage. They are typically made from padded fabric and offer decent protection against bumps and scratches.
- Pros:
- Lightweight and easy to carry.
- More affordable than hard cases.
- Suitable for carry-on luggage.
- Cons:
- Less protection against impacts and compression.
- May not be as durable as hard cases.
Example: The Everything Mary Rolling Sewing Machine Case is a well-regarded soft case with ample padding, multiple compartments, and a smooth-rolling wheel system.
6.3 Rolling Cases
Rolling cases combine the convenience of wheels with the protection of a sturdy case. They are available in both hard and soft versions and are ideal for travelers who want to avoid carrying heavy loads.
- Pros:
- Easy to transport.
- Reduces strain on your back and shoulders.
- Available in hard and soft versions.
- Cons:
- Can be more expensive than non-rolling cases.
- Wheels may add extra weight and bulk.
Example: The Luxja Sewing Machine Rolling Bag is a popular rolling case with a durable construction, multiple pockets, and a telescoping handle.
6.4 Cases With Custom Foam Inserts
Cases with custom foam inserts offer the best protection for your specific sewing machine model. These inserts are designed to hold your machine snugly and prevent it from moving around during transit.
- Pros:
- Provides maximum protection for your machine.
- Prevents movement and shifting during transit.
- Custom-fit design ensures a perfect fit.
- Cons:
- Can be more expensive than generic cases.
- May only fit specific sewing machine models.
Example: Many sewing machine manufacturers offer custom cases with foam inserts designed specifically for their machines. Check with your machine’s manufacturer to see if a custom case is available.
6.5 Factors To Consider When Choosing A Case
When selecting a sewing machine case for air travel, consider the following factors:
- Size and Weight: Make sure the case meets airline restrictions for carry-on or checked baggage.
- Durability: Choose a case made from high-quality materials that can withstand the rigors of travel.
- Padding: Ensure the case has adequate padding to protect your machine from impacts and vibrations.
- Convenience: Look for features like wheels, telescoping handles, and multiple compartments for easy transport and storage.
- Price: Set a budget and compare prices from different manufacturers to find the best value.
By considering these factors and exploring the different types of sewing machine cases available, you can find the perfect case to protect your valuable equipment during air travel.
7. Can You Insure Your Sewing Machine During Travel?
Yes, you can and should consider insuring your sewing machine during travel. Sewing machines can be valuable, and the risks associated with air travel make insurance a wise investment.
7.1 Why Insure Your Sewing Machine?
- Protection Against Damage: Travel insurance can cover the cost of repairing or replacing your sewing machine if it’s damaged during transit.
- Coverage For Loss: If your sewing machine is lost or stolen, insurance can provide compensation for its value.
- Peace Of Mind: Knowing that your sewing machine is insured can give you peace of mind and allow you to focus on enjoying your trip.
7.2 Types Of Insurance Coverage
There are several types of insurance coverage that you can consider for your sewing machine:
- Travel Insurance: Many travel insurance policies offer coverage for personal belongings, including sewing machines. Check the policy details to make sure it covers damage, loss, and theft.
- Homeowner’s Or Renter’s Insurance: Your homeowner’s or renter’s insurance policy may provide coverage for your sewing machine, even when you’re traveling. Check with your insurance provider to confirm the details.
- Specialized Equipment Insurance: Some insurance companies offer specialized equipment insurance for valuable items like sewing machines. This type of policy may provide more comprehensive coverage than standard travel insurance.
7.3 Factors To Consider When Choosing Insurance
When selecting insurance coverage for your sewing machine, consider the following factors:
- Coverage Limits: Make sure the policy provides adequate coverage for the value of your sewing machine.
- Deductibles: Check the deductible amount, which is the amount you’ll have to pay out of pocket before the insurance coverage kicks in.
- Exclusions: Review the policy exclusions to see what types of damage or loss are not covered.
- Claim Process: Understand the claim process and what documentation you’ll need to provide in the event of a loss or damage.
7.4 How To Obtain Insurance Coverage
- Contact Your Insurance Provider: Start by contacting your current insurance provider to see if they offer coverage for your sewing machine.
- Shop Around: Compare policies from different insurance companies to find the best coverage at the most competitive price.
- Read The Fine Print: Before purchasing insurance, carefully read the policy details to make sure you understand the coverage limits, deductibles, and exclusions.
7.5 Tips For Filing A Claim
If your sewing machine is damaged, lost, or stolen during travel, follow these tips to file a claim:
- Notify The Authorities: Report the incident to the airline, hotel, or local police, and obtain a written report.
- Document The Damage: Take photos of any damage to the sewing machine or its case.
- Gather Documentation: Collect all relevant documentation, including receipts, travel itineraries, and insurance policies.
- File The Claim Promptly: File the claim with your insurance company as soon as possible after the incident.
By insuring your sewing machine during travel, you can protect your valuable equipment from potential damage or loss and enjoy your trip with peace of mind.
8. Alternatives To Taking Your Sewing Machine On A Plane?
If the thought of taking your sewing machine on a plane seems too risky or inconvenient, there are several alternative options to consider.
8.1 Renting A Sewing Machine At Your Destination
Renting a sewing machine at your destination can be a convenient and cost-effective alternative to transporting your own machine. Many sewing shops and rental companies offer a variety of machines for rent, ranging from basic models to high-end computerized machines.
- Pros:
- Avoid the hassle and risk of transporting your own machine.
- Try out different sewing machine models.
- Save on baggage fees and insurance costs.
- Cons:
- May not be able to find the exact machine you’re used to.
- Rental fees can add up over time.
- Limited availability in some locations.
8.2 Shipping Your Sewing Machine
Shipping your sewing machine via a courier service like UPS, FedEx, or USPS can be a reliable way to transport your machine without having to carry it on a plane.
- Pros:
- Convenient door-to-door service.
- Tracking and insurance options available.
- Suitable for larger or heavier machines.
- Cons:
- Can be more expensive than other options.
- Risk of damage or loss during transit.
- May take several days for the machine to arrive.
8.3 Borrowing A Sewing Machine
If you’re visiting friends or family at your destination, consider borrowing a sewing machine from them. This can be a great way to save money and avoid the hassle of transporting your own machine.
- Pros:
- Free or low-cost option.
- Convenient and easy.
- Personal connection.
- Cons:
- May not be able to find the exact machine you’re used to.
- Limited availability.
- May not be suitable for all projects.
8.4 Using A Portable Sewing Machine
If you only need a sewing machine for small projects or repairs, consider using a portable sewing machine. These compact machines are lightweight and easy to transport, making them ideal for travel.
- Pros:
- Lightweight and portable.
- Affordable.
- Suitable for small projects and repairs.
- Cons:
- Limited features and capabilities.
- May not be suitable for heavy-duty sewing.
- Less powerful than full-size sewing machines.
8.5 Sewing By Hand
For simple sewing tasks, consider sewing by hand. This can be a great way to save money and avoid the need for a sewing machine altogether.
- Pros:
- Free and easy.
- No equipment required.
- Suitable for small repairs and alterations.
- Cons:
- Time-consuming.
- Limited to simple sewing tasks.
- May not be suitable for larger projects.
By considering these alternatives, you can find the best option for your needs and avoid the potential risks and inconveniences of taking your sewing machine on a plane.
9. What Are The Most Common Issues When Flying With A Sewing Machine?
Flying with a sewing machine can present several challenges, and it’s helpful to be aware of the most common issues to prepare for them.
9.1 Weight And Size Restrictions
One of the most common issues is exceeding the airline’s weight and size restrictions for carry-on or checked baggage. This can result in extra fees or having to check your sewing machine against your preference.
- Solution: Weigh and measure your sewing machine and its case before heading to the airport. Check the airline’s website for specific weight and size limits and make sure you comply.
9.2 Security Delays
Security checkpoints can be a source of delays and stress when traveling with a sewing machine. TSA agents may need to inspect the machine, which can take extra time.
- Solution: Arrive at the airport early to allow plenty of time for security checks. Be prepared to remove the sewing machine from its case and cooperate with the TSA agents.
9.3 Damage During Transit
Damage to your sewing machine during transit is a significant concern. Rough handling by baggage handlers or turbulence during the flight can cause damage to delicate components.
- Solution: Pack your sewing machine securely in a hard case with plenty of padding. Purchase travel insurance to cover potential damage.
9.4 Loss Or Theft
Loss or theft of your sewing machine is another potential issue. Luggage can get lost or misplaced, and theft can occur at airports or hotels.
- Solution: Keep your sewing machine with you whenever possible. If you have to check it, purchase travel insurance to cover potential loss or theft.
9.5 Airline Restrictions
Some airlines may have specific restrictions or policies regarding the transport of sewing machines. These restrictions can vary depending on the airline and the destination.
- Solution: Check with the airline before your trip to inquire about any specific restrictions or policies regarding sewing machines. Print out the relevant policies and keep them with you during travel.
9.6 Improper Handling By Baggage Handlers
Improper handling by baggage handlers can cause damage to your sewing machine, even if it’s packed securely.
- Solution: Label the case as fragile and request that baggage handlers handle it with care. Consider purchasing a brightly colored case to make it easier to identify and prevent misplacement.
9.7 Temperature And Humidity Changes
Temperature and humidity changes during air travel can damage sensitive electronic components and cause corrosion.
- Solution: Place desiccant packs inside the case to absorb moisture and prevent corrosion. Use an insulated case to protect the machine from extreme temperatures.
By being aware of these common issues and taking proactive steps to address them, you can minimize the risks and ensure a smooth and successful trip with your sewing machine.
10. What Are Some Tips For A Stress-Free Experience?
Traveling with a sewing machine can be stressful, but with careful planning and preparation, you can minimize the stress and enjoy a smooth and successful trip.
10.1 Plan Ahead
Planning is key to a stress-free experience. Start by researching airline policies, packing your sewing machine securely, and gathering all necessary documents.
- Airline Policies: Check with the airline for specific weight and size restrictions, as well as any policies regarding sewing machines.
- Packing: Pack your sewing machine securely in a hard case with plenty of padding.
- Documents: Gather all necessary documents, including your ticket, passport, and insurance policy.
10.2 Arrive Early
Arriving at the airport early will give you plenty of time to check in, go through security, and address any unexpected issues.
- Check-In: Check in online or at the airport to avoid long lines.
- Security: Allow plenty of time to go through security, especially if you’re traveling with a sewing machine.
- Unexpected Issues: Give yourself extra time to address any unexpected issues that may arise.
10.3 Stay Organized
Staying organized will help you keep track of your belongings and avoid unnecessary stress.
- Checklist: Create a checklist of all items you need to pack and bring with you.
- Labels: Label all of your bags and cases with your name, address, and phone number.
- Copies: Make copies of important documents, such as your ticket, passport, and insurance policy.
10.4 Be Prepared For Security
Security checkpoints can be a source of stress, but with proper preparation, you can minimize the hassle.
- Notify TSA Agents: Inform the TSA agents that you’re traveling with a sewing machine.
- Remove The Machine: Be prepared to remove the sewing machine from its case for inspection.
- Cooperate: Cooperate with the TSA agents and follow their instructions.
10.5 Stay Calm And Patient
Staying calm and patient is essential for a stress-free experience. Remember that things don’t always go according to plan, and it’s important to stay flexible and adaptable.
- Stay Calm: Take deep breaths and try to stay calm, even if things get stressful.
- Be Patient: Be patient with airline staff, security agents, and other travelers.
- Stay Positive: Focus on the positive aspects of your trip and try to enjoy the experience.
10.6 Take Advantage Of Airport Amenities
Airports offer a variety of amenities that can help you relax and de-stress.
- Lounges: Relax in an airport lounge and enjoy complimentary snacks and drinks.
- Shopping: Browse the shops and find a souvenir to take home with you.
- Dining: Enjoy a meal at one of the airport’s restaurants or cafes.
10.7 Stay Connected
Staying connected with friends and family can help you stay grounded and reduce stress.
- Phone Calls: Make phone calls to friends and family to let them know you’re safe and sound.
- Social Media: Share your travel experiences on social media.
- Email: Check your email and stay up-to-date on important news.
By following these tips, you can minimize stress and enjoy a smooth and successful trip with your sewing machine. Safe travels from all of us at worldtransport.net!
If you want to explore more in-depth analyses, trend forecasts, and innovative solutions in the transportation sector, don’t hesitate to visit worldtransport.net today. Our resources are designed to keep you informed and ahead in this fast-evolving industry. Whether you’re seeking specific advice or broader insights, we’re here to assist you. Contact us at 200 E Randolph St, Chicago, IL 60601, United States, or call +1 (312) 742-2000 for more information.
Frequently Asked Questions (FAQs)
1. Can I carry a sewing machine as carry-on luggage?
Yes, you can usually carry a sewing machine as carry-on luggage, provided it meets the airline’s size and weight restrictions. It’s essential to check these restrictions with your specific airline before traveling.
2. Do I need to declare my sewing machine at airport security?
Yes, it’s a good idea to inform the TSA agents that you are traveling with a sewing machine. This can help streamline the security process and prevent any misunderstandings.
3. What’s the best way to pack a sewing machine for air travel?
The best way to pack a sewing machine is to use a hard case with custom foam inserts for maximum protection. Wrap the machine in bubble wrap, secure any detachable parts, and label the case as fragile.
4. Can I insure my sewing machine during travel?
Yes, you can insure your sewing machine during travel. Consider travel insurance, homeowner’s insurance, or specialized equipment insurance to protect against damage, loss, or theft.
5. What should I do if my sewing machine is damaged during air travel?
If your sewing machine is damaged during air travel, notify the airline immediately and file a claim with your insurance company. Document the damage with photos and gather all relevant documentation.
6. Are there any restrictions on the type of sewing machine I can bring on a plane?
While most sewing machines are allowed, it’s best to check with the airline for any specific restrictions. Some airlines may have limitations on the size or weight of the machine.
7. Can I bring sewing needles in my carry-on luggage?
Yes, sewing needles are generally allowed in carry-on luggage, but they must be stored safely. It’s best to keep them in a secure case or container to prevent injury.
8. Is it better to carry on or check my sewing machine?
Whether to carry on or check your sewing machine depends on its size, weight, and value, as well as your personal preference. Carrying it on allows you to keep a close eye on it, while checking it may be more practical for larger machines.
9. What are the alternatives to bringing a sewing machine on a plane?
Alternatives include renting a sewing machine at your destination, shipping your sewing machine, borrowing a machine, using a portable sewing machine, or sewing by hand.
10. How can I make the experience of flying with a sewing machine less stressful?
Plan ahead, arrive early, stay organized, be prepared for security, stay calm and patient, take advantage of airport amenities, and stay connected with friends and family.
