Is your VW Transporter Key not turning smoothly in the ignition, or is your vehicle failing to start intermittently? These could be signs of a failing ignition switch. Fortunately, replacing it is a task you can tackle at home with some basic tools. This guide provides a step-by-step walkthrough to help you replace your VW Transporter ignition switch, ensuring your key operates smoothly and your van starts reliably.
Before you begin, ensure you have a new ignition switch. An OEM (Original Equipment Manufacturer) switch is recommended for optimal performance and compatibility, as shown in the image below.
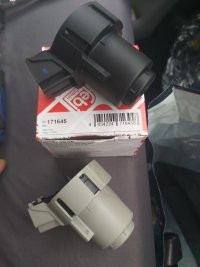 New OEM ignition switch for VW Transporter key system, ready for replacement
Step-by-Step Ignition Switch Replacement
1. Accessing the Steering Column:
First, you need to access the ignition switch located behind the steering wheel. Begin by unclipping the top steering column cowl. Trim tools can be helpful for gently prying it open without causing damage. Tilt the top cowl towards the instrument cluster display (MFD) to gain access to the components beneath.
2. Steering Wheel and Airbag Removal (Safety First!):
For safe access, you’ll need to temporarily remove the steering wheel and airbag. Crucially, disconnect the vehicle battery before proceeding with this step. This is a vital safety precaution to prevent accidental airbag deployment, which could cause serious injury. For detailed instructions on removing the airbag and steering wheel, refer to a comprehensive guide like the one provided by @Pauly on the T6 Forum.
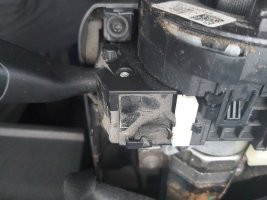
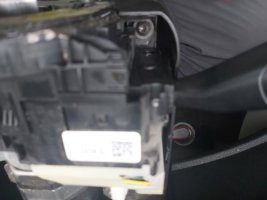
3. Removing the Lower Steering Column Cowl:
Once the top cowl, airbag, and steering wheel are safely set aside, you can remove the lower steering column cowl. Locate and remove the two Torx screws (size T25 is typical, but verify) from the underside of the lower cowl. With the screws removed, gently wiggle and pull the cowl towards you to detach it. This will expose the ignition switch assembly.
 Location of Torx screws on VW Transporter bottom cowl for ignition switch access
 Removing the bottom cowl of a VW Transporter to access the ignition switch and key assembly
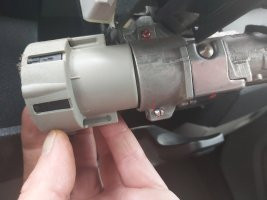
4. Unplugging the Old Ignition Switch:
Now you can access the ignition switch itself. Locate the electrical connector plugged into the switch. To unplug it, lift the small red locking tab on the connector and then pull the plug away from the switch.
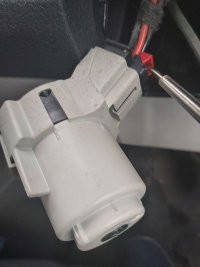 Unplugging the electrical connector from the VW Transporter ignition switch, essential step for key system repair
5. Removing the Ignition Switch from the Barrel:
The ignition switch is secured to the ignition barrel with two grub screws. These screws are typically covered with red paint. Use a small tool to carefully scrape away the red paint to access the grub screws. Once exposed, use a suitable tool (often a small Allen key or Torx bit) to loosen the grub screws. You only need to loosen them a few turns; there’s no need to fully remove them. With the screws loosened, you can now remove the old ignition switch by gently pulling it out.
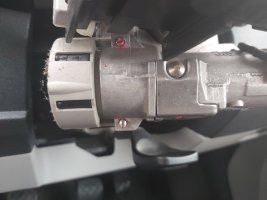 Red paint covering grub screws on VW Transporter ignition switch, needing removal for key cylinder access
 Undoing the grub screws on the VW Transporter ignition switch to release and replace the key mechanism
The image below shows the ignition barrel with the switch removed. You can see the pin inside the barrel that interacts with your VW Transporter key. When you insert and turn the key, this pin engages with the ignition switch, activating the vehicle’s electrical systems.
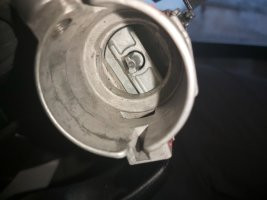 Internal mechanism of VW Transporter ignition barrel showing pin interaction with the key to activate the switch
6. Installing the New Ignition Switch and Testing:
Push the new ignition switch into the barrel, ensuring your VW Transporter key is removed from the ignition during installation. Tighten the grub screws to secure the new switch. Reconnect the electrical plug to the new switch.
Testing Before Full Reassembly (Recommended):
Before fully reassembling everything, it’s wise to test the new switch. Important: To prevent error codes, temporarily reconnect the airbag and steering wheel control plugs. You can simply slot the steering wheel back onto the column (without tightening the nut) and rest the airbag against the wheel without clipping it in. Reconnect the vehicle battery. Now, test the ignition with your transporter key. If the van starts, the new switch is working correctly.
7. Final Reassembly:
After confirming the new switch functions, disconnect the battery again. Unplug the airbag and steering wheel controls, and remove the steering wheel. Now, proceed with the final reassembly in reverse order:
- Reinstall the lower steering column cowl and secure it with the Torx screws.
- Reinstall the steering wheel, ensuring it’s correctly aligned with the spline, and tighten the steering wheel nut to the correct torque specification.
- Reconnect the plugs for the airbag and steering wheel controls.
- Carefully push the airbag back into its clips on the steering wheel until it is securely in place.
- Finally, clip the top steering column cowl back into position.
Job Complete!
You have now successfully replaced your VW Transporter ignition switch. Your transporter key should now turn smoothly, and your vehicle should start reliably. Regular maintenance and addressing issues promptly, like a faulty ignition switch, are key to keeping your VW Transporter in top condition.